Why this is the hinge
Every CPR sequence in this course pivots on a single binary decision: is this casualty unresponsive and not breathing normally, or not? If yes, you start chest compressions immediately. If no, you do something else — recovery position, monitoring, treating whatever else is wrong. The decision is binary, the action that follows is determined entirely by the answer, and the casualty's outcome depends on the decision being made fast and correctly. G3 G5
The two parts of the decision are unresponsive and not breathing normally. Both have to be present. Both have a specific assessment technique. Both can fool you if you don't know what to look for — particularly the breathing assessment, where the most common mistake (mistaking agonal breaths for normal breathing) is the single biggest reason bystander CPR is delayed or skipped.
This chapter is about how to make the decision in the way that minimises both errors: not starting CPR when you should (the worse error, because it kills the casualty) and starting CPR when you shouldn't (the lesser error, because the consequences are usually only some bruising and an awkward conversation).
§ Instructor's note
The teaching point of this chapter is to make the assessment fast and the threshold low. Learners often arrive thinking they need to be "sure" before they start CPR — and the search for certainty is where they lose the time the casualty needs. The actual standard is the opposite: if you are not sure whether the casualty is breathing normally, start CPR. The risk-benefit is firmly on the side of compressing a casualty who turns out to be okay, rather than not compressing one who turns out not to be. Drill the rule: uncertainty defaults to CPR, every time.
The DRSABCD frame
The recognition assessment fits into the standard ANZCOR primary survey, DRSABCD:
- D — Danger. Scene safety. Is it safe for me, bystanders, and the casualty? See the incident hazards chapter.
- R — Response. Is the casualty responsive? (Covered below.)
- S — Send for help. Call 000 (or send a bystander to call). See the accessing emergency services chapter.
- A — Airway. Open the airway. See the upper airway chapter.
- B — Breathing. Is the casualty breathing normally? (Covered below.)
- C — CPR. If not breathing normally, start chest compressions.
- D — Defibrillation. Apply an AED as soon as one is available. See the AED use chapter.
The recognition decision lives in the R and B steps. Everything else in DRSABCD either prepares you for those steps (D, S) or follows from the answer (A, C, D).
Step R — checking responsiveness
The first half of the recognition decision is whether the casualty is responsive. The standard ANZCOR technique is the COWS approach, sometimes called shake-and-shout:
- C — Can you hear me? Loud, clear voice, close to the casualty's face.
- O — Open your eyes. Direct command.
- W — What is your name? Direct question.
- S — Squeeze my hand. Place your hand in theirs and ask them to squeeze.
You also gently shake the casualty's shoulders while talking — firm enough to wake a sleeping person, gentle enough not to worsen any spinal injury. The whole assessment takes about 5 seconds.
The casualty's response falls into one of four categories:
- Alert and oriented. They open their eyes, answer your questions, and respond appropriately. They are responsive — proceed with whatever else is wrong (bleeding, pain, history) but they are not in cardiac arrest.
- Responsive to voice. They open their eyes or move when you speak to them but are confused or not fully oriented. They are responsive — assess and treat the underlying cause.
- Responsive to pain. They do not respond to voice but moan, move, or push you away when you shake them firmly. They are unresponsive in the sense that matters, although there is some neurological function present. Proceed to airway and breathing assessment.
- Unresponsive. No response to voice, no response to pain, no spontaneous movement. This is the trigger to move immediately to the airway and breathing steps.
In the standard ANZCOR scheme, anyone who does not respond to voice or shaking is "unresponsive" for the purposes of the next step, and you proceed to open the airway and check breathing without further delay.
Step S — send for help (immediately)
The instant you have determined the casualty is unresponsive, call for help. If there are bystanders, point at one specific person and direct them to call 000 and to fetch an AED. If you are alone, call 000 yourself (using speakerphone if you can, so you can keep both hands free) and then continue the assessment. The detail of the call is in the accessing emergency services chapter; the point is that the call has to happen as part of the recognition, not after.
This is the moment in the protocol where the chain of survival actually starts (see the chain of survival chapter).
Step A — open the airway
Before you can assess breathing, you have to open the airway. The technique is the head-tilt / chin-lift, covered in the upper airway chapter:
- Place one hand on the casualty's forehead and tilt the head back gently.
- Place the fingers of the other hand under the bony chin and lift the chin forward and up.
- The neck extends, the jaw lifts, the tongue moves forward off the back of the throat, and the airway opens.
For an infant under 1 year old, use a neutral or only slightly extended head position rather than full extension — over-extending an infant's neck can collapse the soft airway, the opposite of the adult result. See the CPR anatomy chapter.
This step takes about 2 seconds and is the prerequisite for everything that follows. Without an open airway, the breathing assessment is meaningless — the casualty cannot move air through an obstructed airway whether they are trying to or not.
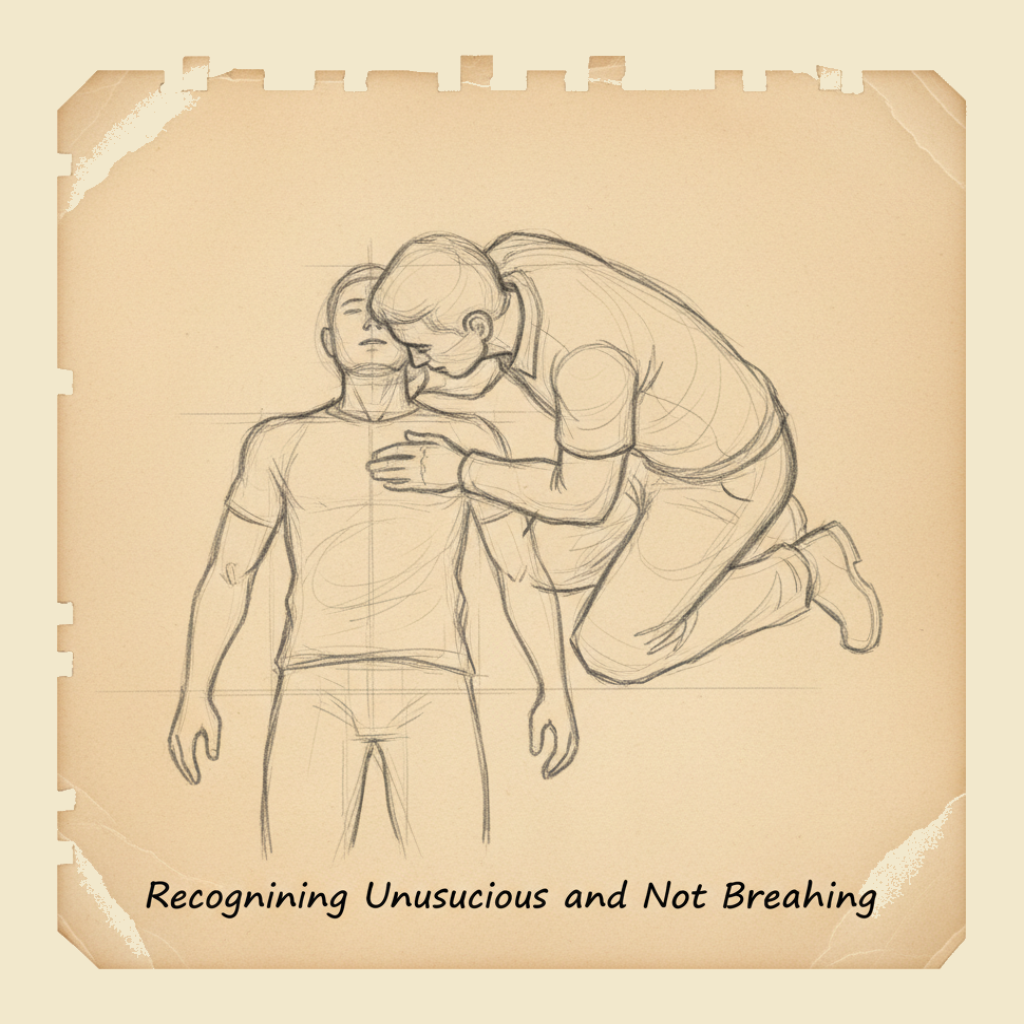
Step B — checking for normal breathing
With the airway open, the second half of the recognition decision is whether the casualty is breathing normally. The standard technique is Look, Listen, and Feel, performed for up to 10 seconds:
- Look at the chest for the rise and fall of normal breathing.
- Listen at the casualty's mouth and nose for the sound of normal breath sounds.
- Feel for breath against your cheek or ear, which you have positioned a few centimetres from the casualty's mouth.
You do all three at once, with your face close to the casualty's, watching the chest down the line of their body. The whole assessment takes up to 10 seconds — count it deliberately, "1 elephant, 2 elephant..." or "1-1000, 2-1000..." — and you make your decision at the end.
What you are looking for is normal, regular breathing — clear, rhythmic chest rise and fall, audible breath sounds, air movement at the mouth. A casualty who is breathing normally will demonstrate all three within the first few seconds of the 10-second window.
What you are looking out for, and what is the most important single piece of knowledge in this chapter, is agonal breathing.
Agonal breathing — the trap
In the first minute or two of cardiac arrest, many casualties do something that looks like breathing but isn't. Agonal breathing is a brainstem reflex that produces:
- Slow, irregular gasps — sometimes one breath every 10–20 seconds.
- Snoring or sighing sounds.
- Snorting or grunting.
- Shallow chest movements that look more like gulps than breaths.
- Pauses of 5–10 seconds or more between gasps.
- Mouth opening and closing without effective air movement.
- A "fish-out-of-water" appearance.
Agonal breaths are not normal breathing. They are a sign of cardiac arrest, not a sign of life. The brainstem is firing the breathing reflex because it is running out of oxygen — the same reflex that makes you gasp when you've held your breath too long — and what you're seeing is the dying-but-not-yet-dead brain trying to draw a breath that the failing heart cannot circulate.
The casualty with agonal breathing is in cardiac arrest and needs CPR right now. The presence of agonal breathing is not a reason to delay or withhold CPR; it is a confirmation that CPR is needed.
The reason this matters so much is that agonal breaths are the single most common reason bystander CPR is delayed or not started. A bystander who watches a casualty for 10 seconds, sees a gasp or two, decides "well, they're still breathing" and waits is making the most consequential mistake in resuscitation. Studies of out-of-hospital cardiac arrest consistently show that about 40% of arrest casualties have agonal breaths in the first few minutes, and that bystanders consistently misinterpret them as "still breathing".
The rule, drilled into every first aider: if the breathing is not clearly normal, regular, rhythmic breathing — treat the casualty as not breathing and start CPR. The default of uncertainty is CPR.
If you see a casualty take an occasional deep gasping breath, or a series of irregular snorts, or one breath followed by a long pause, that casualty is in cardiac arrest. The gasps are agonal breaths and they are not effective breathing. Do not let them fool you. Do not "wait to see what happens". Start CPR immediately. The casualty's only chance is for compressions to start now.
"Not breathing normally" is the standard
Notice that the ANZCOR standard is not "not breathing at all". It is "not breathing normally". The phrasing is deliberate, and it is the single most important wording in the whole CPR protocol.
A casualty who is genuinely apnoeic — no breathing at all — is obviously a CPR case and there is no decision to make. The harder case is the casualty who is making some respiratory effort but it is not normal. The standard is to treat this casualty as being in cardiac arrest and start CPR. The reasons:
- Agonal breathing is a sign of arrest, not a sign of life. The reflex is preserved for a few minutes after the heart fails; it is not evidence that the heart is still working.
- The cost of starting CPR on a casualty who turns out to be okay is small. Some bruising, a sore chest, an embarrassing moment — all entirely recoverable. The casualty who wakes up annoyed with you is alive.
- The cost of not starting CPR on a casualty who is actually in arrest is fatal. Every minute of delay reduces survival by about 10%. Five minutes of "wait and see" can be the difference between full recovery and death.
The risk-benefit is overwhelming. Start CPR.
Pulse checks — why first aiders don't do them
You will notice that the recognition assessment in this chapter does not include a pulse check. This is deliberate.
Historically, first aiders were taught to check the carotid pulse before starting CPR. ANZCOR (and every other major resuscitation council) removed this step from layperson protocols in the early 2000s, because:
- Untrained and even trained rescuers are bad at finding pulses under stress. Studies showed accuracy rates as low as 50% — equivalent to a coin flip.
- The pulse check takes time — typically 10–15 seconds in inexperienced hands, with rescuers often checking, hesitating, checking again, and burning a minute or more before deciding.
- A false-positive pulse check (thinking you can feel a pulse when you can't) leads to delayed or absent CPR.
- A false-negative pulse check (thinking you can't feel a pulse when you can) leads to CPR being started on a casualty who doesn't need it — which, as discussed, is a much smaller harm.
- The "unresponsive and not breathing normally" criterion is at least as accurate as a pulse check and is faster.
Paramedics and clinicians still check pulses; they have the training and the experience to do so reliably. First aiders skip the step. If the casualty is unresponsive and not breathing normally, you start CPR — full stop.
How long the whole assessment should take
From the moment you reach the casualty's side to the moment you start chest compressions on a casualty in cardiac arrest, the entire DRSABCD assessment should take about 30 seconds:
- 5 seconds — Danger (scene scan).
- 5 seconds — Response check (shake and shout).
- 5 seconds — Send for help (point and direct).
- 2 seconds — Airway (head-tilt / chin-lift).
- Up to 10 seconds — Breathing (look, listen, feel).
- Decision: not breathing normally → start CPR.
That is half a minute. Any longer is a half-minute the casualty's brain is going without circulation, and the casualty is ageing in dog-years. The whole sequence should be drilled until it is automatic, so that the panic of a real call doesn't make you redo it more slowly.
Children and infants — the same recognition with small variations
The recognition assessment for a child or infant is very similar to an adult, with two minor differences:
- Response check on an infant: rather than asking questions, you flick the soles of the feet or gently shake the body. An infant does not respond to "what is your name" and the right test is whether they react to physical stimulation.
- Airway position on an infant: neutral or slightly extended, not the full adult head-tilt. As discussed in the upper airway chapter.
Otherwise the sequence is identical: check response, send for help, open airway, check breathing for up to 10 seconds, start CPR if not breathing normally. The threshold for starting CPR is the same: anything other than clearly normal regular breathing is the trigger.
For a child or infant whose collapse appears to be from a respiratory cause (drowning, choking, asthma, anaphylaxis) or who collapsed unwitnessed, ANZCOR recommends 2 minutes of CPR before calling 000 if you are alone — the underlying problem is hypoxia, and 2 minutes of compressions and breaths can sometimes restore spontaneous circulation. See the chain of survival chapter for the rationale.
If you start CPR and the casualty starts to respond — moves, gasps with regular pattern returning, opens their eyes — stop CPR, place them in the recovery position, and re-check breathing. Casualties who arrest can have transient returns of spontaneous circulation, and they can re-arrest within minutes. Stay alert. Be ready to restart CPR immediately if they deteriorate again. Do not pack up and leave; stay until paramedics arrive.
A casualty who is unresponsive and not breathing normally should be considered to be in cardiac arrest and CPR should be commenced without delay. Breathing should be assessed for up to 10 seconds by looking for chest movement, listening for breath sounds and feeling for air against the rescuer's cheek. Agonal or gasping respirations are not normal breathing and are a sign of cardiac arrest, not a sign of life. Pulse checks are not recommended for lay rescuers, who should rely on the absence of normal breathing as the trigger for commencing chest compressions.
What not to do
- Do not wait until you are "certain" the casualty is in arrest. Uncertainty defaults to CPR.
- Do not mistake agonal gasps for normal breathing. If the breathing isn't clearly normal, treat the casualty as not breathing.
- Do not check for a pulse — first aiders rely on the breathing assessment.
- Do not spend more than 10 seconds on the breathing check. Decide and act.
- Do not delay sending for help to "make sure first". Send for help the moment the casualty is unresponsive.
- Do not skip the airway-opening step. The breathing check is meaningless if the airway is obstructed.
- Do not leave a casualty who has briefly responded — stay with them, monitor, be ready to restart CPR.
You will rehearse the DRSABCD primary survey on a manikin and on a partner until it is automatic — 30 seconds, every step in order, every time. The instructor will deliberately set up scenarios with agonal-breathing manikins so you can feel the difference between normal breathing and the gasping pattern, and you will practise making the recognition decision under time pressure. By the end of the day, the assessment should feel like a single fluid sequence rather than seven separate steps.
Recognition is the hinge of CPR. Get it right and the rest of the sequence runs as designed. Get it wrong — by waiting, by mistaking agonal breaths for normal ones, by checking a pulse you cannot reliably feel — and the casualty's chain of survival breaks at the first link. The rule is short: unresponsive and not breathing normally → start CPR.
— ANZCOR Guideline 3 (recognition of an unconscious person)